Curious to learn more about different kinds of wireframes? From hand-drawn paper sketches to interactive blueprints, find out how different types of wireframe support ideation, collaboration...
SUMMARISE WITH:
Curious to learn more about different kinds of wireframes? From hand-drawn paper sketches to interactive blueprints, find out how different types of wireframes support ideation, collaboration, and planning in the UX design process.
With wireframing reported to reduce overall design time by up to 50%, it’s no surprise that designers and their teams are so invested in using them. These simple sketches, whether created digitally or by hand, are not just a blueprint for an interface, they are an ideation and collaboration tool that supports rapid iteration and cross-team alignment, significantly contributing to the UX design process overall.
If you’re curious to learn more about wireframes, how they work, and their different types, then you’re in the right place. In this post, we’re going to be walking you through eight different types of wireframe examples, from low-fidelity wireframes to interactive wireframes and everything in between. We’ll also be highlighting some of the most popular wireframing tools and offering best practices and advice. By the end, you’ll have a clear idea of the wireframes best suited to each kind of project, and be ready to start sketching your first ideas.
Contents:
Are you ready to dive into wireframing? Then let’s go!
What is a wireframe?
A wireframe is a minimalist line drawing that is created during the exploratory phase of the UX design process to test the scope of a product or the suitability of different ideas. It is used to inform designers and developers of the architecture, layout, and key functions of a webpage, app, or other digital interface. This simple outline provides design teams with a visual guide that enables them to align on the intended page structure, user flow, functionality, and content hierarchy of the interface, as well as demonstrate how users might behave as they navigate their way through it.
While there’s a wide range of software out there for UX designers to utilize when it comes to wireframing, it’s not uncommon to draw them roughly by hand, particularly at the very start of a project when the goal is often to get a number of different interface ideas down on the page. Wireframe tools can be brought in later to enable a designer to add more depth and detail, insert interactive elements, and more easily collaborate with other team members, developers, and project stakeholders.

Eight examples of different types of wireframes
Let’s run through eight of the most common types of wireframes that design teams use to communicate their ideas, collaborate with colleagues, and test their designs with users.
i. Low-fidelity wireframes

Whether drawn by hand or created using a wireframing tool such as Figma, a low-fidelity wireframe is a simple skeletal line drawing of a digital interface like a web page or an app that is typically created in black and white. These wireframes include only the essential elements of the end design such as where images, text, buttons, or interactive elements will be placed on the page.
As low-fidelity wireframes usually only reflect the basic architecture and features of an interface, they are perfect for when a UX designer is at the start of a project and wants to try out variations of a design. They cost virtually nothing to create, are extremely quick to produce, and a designer can create many of them at speed thanks to the focus being only on the main elements of the interface.
When working on low-fidelity wireframes, try to keep things simple. In order to create a low-fidelity wireframe at speed or to create multiple versions of a low-fidelity wireframe, the design should aim for both abstractness and minimalism. When these facets are prioritized, the focus of the design remains on communicating the essential information and the functionality of the interface, which, at this early stage in the design process, are the main objectives of the design team.
ii. High-fidelity wireframes

In contrast to a low-fidelity wireframe, a high-fidelity wireframe comes later in the design process and is a more detailed and advanced version of the former. Due to the need for detail, high-fidelity wireframes are almost always created using specific wireframing software that can create a realistic prototype of the end design.
Details that would be expected of a high-fidelity wireframe include images, CTA buttons, icons, colors, and typography choices. Depending on the software used, interactive elements might also be included. WitWith high-fidelity wireframes requiring significantly more investment of time and resources than their low-fidelity counterparts, they should be created only for projects where production on the interface has been approved and after earlier iterations of the design have been signed off by all relevant parties.
A top tip for designers working on high-fidelity wireframes is to aim for both consistency and realism within their designs. Consistency of design elements such as typography and alignment supports a cohesive and professional outcome, while realistic content such as text or images helps the team gain a real feel for what the user’s experience with the final product will be.
iii. Digital wireframes

A digital wireframe is a blueprint of an interface that has been created using wireframing software and is typically created during the early stages of the UX design process. The terms “digital wireframe” and “wireframe” are often used interchangeably. However, “digital wireframe” always implies that digital software or tools were employed to create it.
The distinction between a wireframe and a digital wireframe is not always significant as both can be either high-fidelity or low-fidelity, detailed or without any detail. Typically, however, digital wireframes err on the side of simplicity, containing the essentials of the blueprint such as the lines and shapes needed to indicate the intended architecture and design components of the design.
There are numerous tools out there to support designers in creating professional digital wireframes of both high and low fidelity. We’d recommend trying out the following: UXPin, InVision, Figma, Balsamiq, Sketch, and Justinmind.
iv. Paper sketches

In contrast to digital wireframes, paper sketches are drawn by hand and are used at the start of a design project when the designer is looking to quickly create a rough representation of a digital product’s interface.
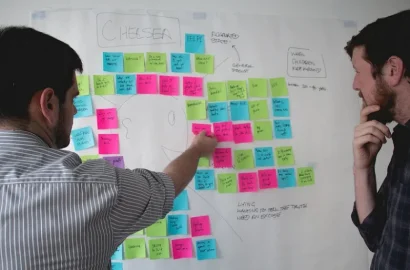
With paper and a pen being the only tool needed to create paper wireframes, this is a low-cost technique that enables rapid iteration. Other benefits of creating sketches on paper include the low time commitment–you just grab a pen and a Post-It note to get started–and the collaboration opportunities with other team members. Some designers note that feedback on quick paper sketches tends to be more honest than the feedback received for digital wireframes, likely because of the smaller investment of time and resources that has gone into them. This environment of fast feedback and iteration is perfect for the early stage of the design process when the team is looking to explore lots of ideas and solutions.
When creating wireframes by hand, don’t worry about creating a perfect representation of the final design. Instead, sketch freely and try things out. At this stage, your focus should be on getting your ideas down on the page as quickly as possible. You can focus on the details of the design once the basic elements have been signed off by the whole team.
v. Interactive/clickable wireframes

Interactive wireframes (also known as clickable wireframes or clickable prototypes) are created by designers who want to demonstrate the functionality of a particularly important part of the user interface to users or stakeholders during testing or feedback rounds. These wireframes go a step beyond the traditional static wireframe as they simulate user actions through the incorporation of elements that can be interacted with (or clicked on).
Interactive wireframes are a useful tool in the designer’s toolkit as they can help bring stakeholders on board with an idea more effectively than a static wireframe thanks to the more realistic representation they are able to convey. For validation and testing too, interactive wireframes provide the design team with a tool for gathering more accurate data and feedback related to the user experience of the design which can be used to inform and improve later versions.
Tools such as UXPin are often used to create interactive wireframes. This cutting-edge software effortlessly enables designers to include interactive design components such as buttons, dropdown menus, input forms, or basic navigational functions that mimic the intended final interface.
Don’t forget to provide clear documentation of your process and progress on your interactive wireframes, detailing points of user interaction and the design’s intended functionality. This helps the development team know how the final product should behave when it comes to implementing your design.
vi. Responsive wireframes

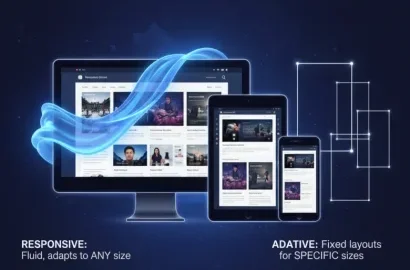
A responsive wireframe is a visual replica of an interface that is designed to demonstrate how its contents can adapt and respond to different screen sizes and devices. Responsive wireframes assist in the communication between the design and development teams by effectively demonstrating the architecture of an interface and the placement of design components on different browser types in addition to showcasing the design’s overall adaptability.
One of the main benefits of using responsive wireframes is the support this technique offers to the overall development process. With a responsive wireframe, a designer can avoid any misinterpretations of their design while the developer can clearly see how the structure and functionality of an interface are intended to work on a range of different devices. Tools we’d recommend for creating responsive wireframes would be Balsamiq and Mockplus.
When creating responsive wireframes, always design for mobile first. This is so you can ensure that all critical functions and content are prioritized. Additionally, mobile devices are the primary ones users employ for accessing the internet, so focusing on your mobile wireframes means you are catering to the needs, goals, and experiences of the majority of your audience.
vii. Annotated wireframes
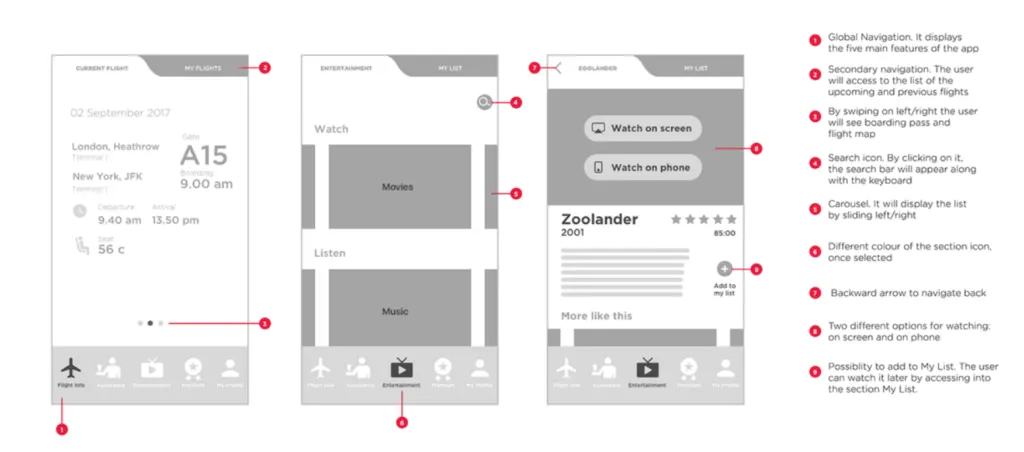
As the name suggests, annotated wireframes are digital or hand-drawn sketches of an intended interface design that include information, notes, comments, or feedback, adding clarity to the visual design. Particularly useful for all those working on or invested in a project, such as stakeholders, other designers, or developers, these annotations accompany different sections of the wireframe to offer further insights that are not immediately obvious from the design itself.
In addition to descriptions of elements and functionality notes, an annotated wireframe might also include technical specifications for the development team such as dimensions or alignment instructions to help make the transition from design to development as seamless as possible.
Here are our top tips for annotating your wireframes:
- Ensure your notes are concise and to the point
- Keep the formatting and style of your notes consistent
- Clearly label all of your design elements
- Draw special attention to key functionalities or requirements
- Carefully document any revisions or iterations
- Where possible, include justification for design decisions
viii. Mobile app wireframes

With the rise in smartphone usage, the importance of designing well for mobiles has significantly increased in recent years. In fact, reports suggest that 50% of mobile users will even leave a website if it isn’t mobile-friendly. For this reason, a team’s ability to create effective mobile app wireframes will significantly contribute to the success or failure of a new product or venture.
Mobile app wireframes are design sketches explicitly depicting the layout and functionality of a mobile app interface. These blueprints–which can be created digitally or by hand–tend to focus on screen layout, content placement within the mobile interface, the hierarchy of elements, navigational flow, and responsive design considerations to ensure a streamlined experience for mobile app users. The best apps for mobile app wireframes include Adobe XD, Framer, InVision, and Lucidchart.
A best practice of mobile app wireframe creation is the inclusion of thumb-friendly interactions. What this means is arranging and placing key design elements within easy reach of the user’s thumb so that they can achieve their goals with minimal strain when navigating the interface while using just one hand.
Conclusion
In this article, we’ve run through eight of the most common types of wireframes used by UX designers at different stages of their design process. From simple hand-drawn and low-fidelity wireframes through to interactive prototypes, wireframes support cross-team communication and collaboration, assist with user testing, and provide a design blueprint on which everyone can align.
If you’re new to wireframing, we’d recommend you try drawing your own wireframes by hand or experimenting with one of the many free wireframing tools out there such as Figma, Penpot, or Miro, to build up your experience until you feel ready to progress onto more advanced software. We also recommend checking out this detailed UI UX Project by AND learner Aromal Jose Baby for actionable insights and practical guidance.
Next Steps
We hope our comprehensive list of examples could help inspire the designer within you. In case you are interested to learn more about UX design, consider going through the following resources:
- Watch this session by Shiva Viswanathan, Design Head of Ogilvy Pennywise, and Naman Singh, Product Experience Designer at RED.
- Talk to a course advisor to discuss how you can transform your career with one of our courses.
- Pursue our UI UX Design courses – all courses are taught through live, interactive classes by industry experts, and some even offer a Job Guarantee.
- Take advantage of the scholarship and funding options that come with our courses to overcome any financial hurdle on the path of your career transformation.
Note: All information and/or data from external sources is believed to be accurate as of the date of publication.

